- HOME
- Ink Stick Production Process
Ink Stick Production Process
From soot on a lid to strokes on a page, this is how we produce ink stick.
-
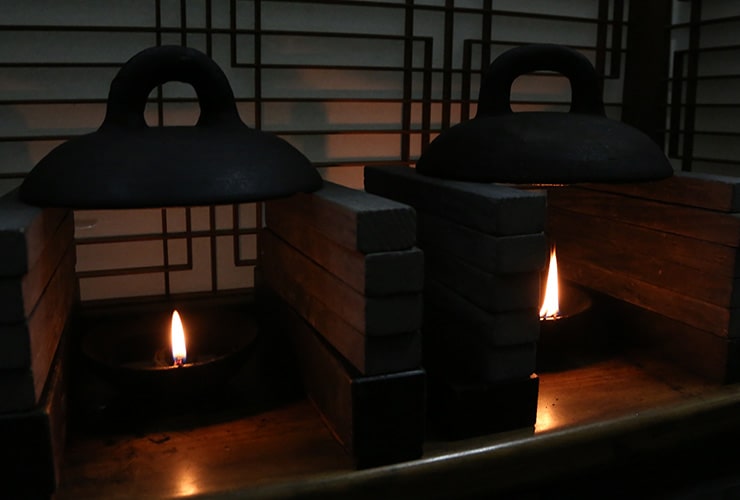
1. Soot Removal
Vegetable or sesame oil is burned in an earthenware pot called a “kawarage”, and soot forms on the lid above it. We remove the soot from this lid to use for our ink.
-
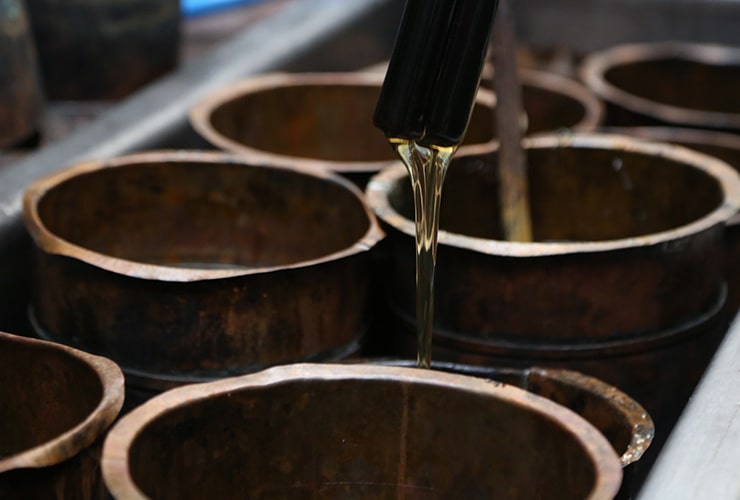
2. Gelatin Solution, Ingredient Stirring
We mix the water and gelatin in an iron pot called a “tampo”, and melt those together by placing the pot in boiling water. We stir this for four hours to make the gelatin solution. Then we add the soot, then some spices to give it a nice aroma, and knead it all together with a roller. We also step on it with our feet or knead it with our hands to create the raw ink.
-
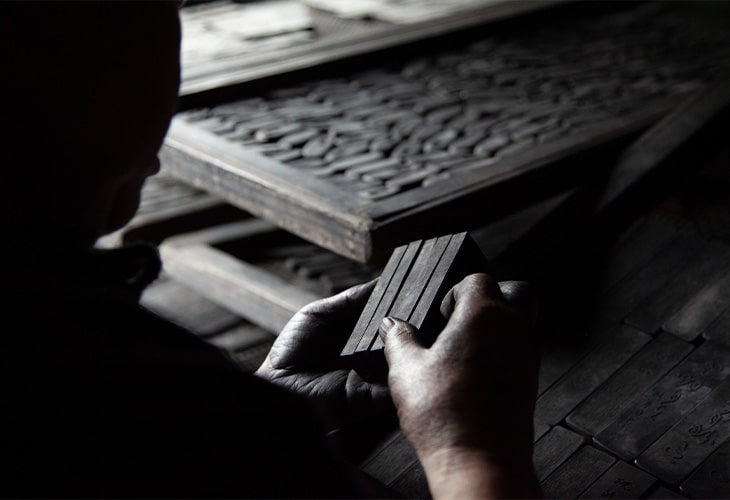
3. Wooden Patterns and Molds
We use molds made from the wood of a pear tree to add certain patterns and shapes to the raw ink.
Though the final product has a weight of 15g, that same amount of raw ink weight 26g at this stage due to the amount of water still in it.
Here, we lighten the raw ink to add it to a set wooden pattern.
It is important to knead the raw ink in 12 parts to make sure no air gets in.
-
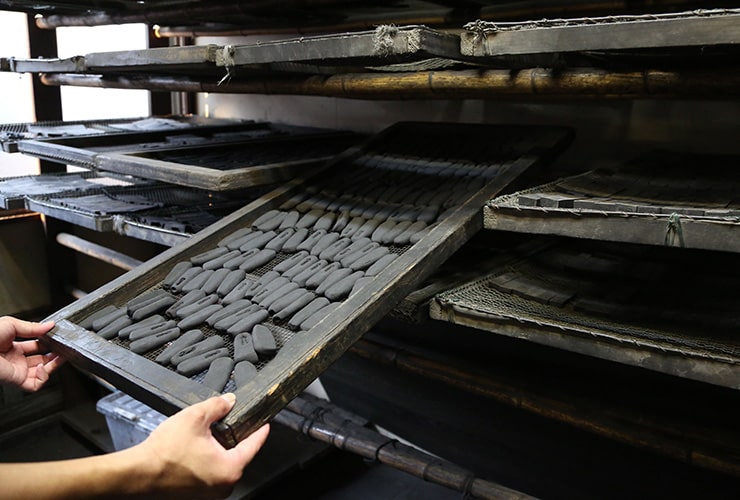
4. Ash Drying
Next, we must remove the water after taking the raw ink out of the wooden molds. First, we wrap it in newspapers, bury it in wood ash with a small amount of water, and then rebury it in gradually drier wood ash. This is the same wood ash that has been used by previous generations at Kinkoen.
Smaller sticks of ink require one week to dry, while larger stick require three to five weeks.
Cracks develop if the ink is dried naturally (and therefore too quickly), so we use this method to gradually remove the water.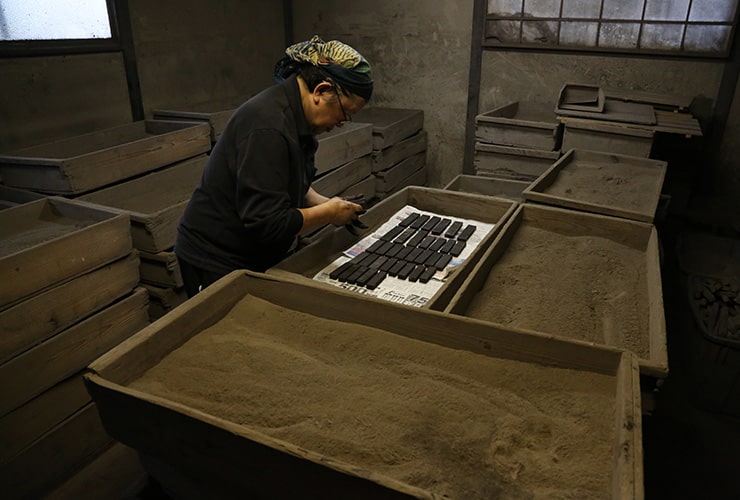
-
5. Natural Drying
When 60~70% of the water is removed, we move on from using wood ash to letting the ink dry naturally. It takes about three months to dry a small size and about six months to dry a large size.
-
6. Polishing
Now that the ink has naturally dried, we wash it with water to remove any ash or other material from the surface.
Then, after painting on the glaze, we quickly scorch it with charcoal, and then polish it with a clam shell.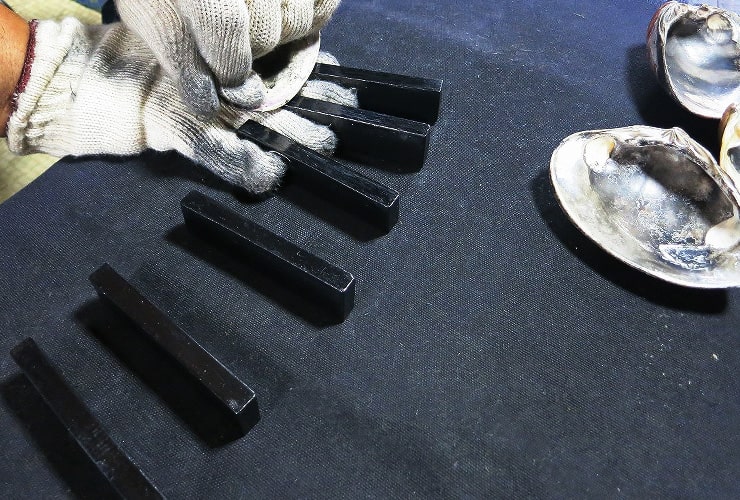
-
7. Color
After the polished ink has been washed, we remove the water by placing it in criss-crossed stacks for three days to a week and let it air dry.
Then we add gold, silver, or other colors of powder to the character or figure to give it some color.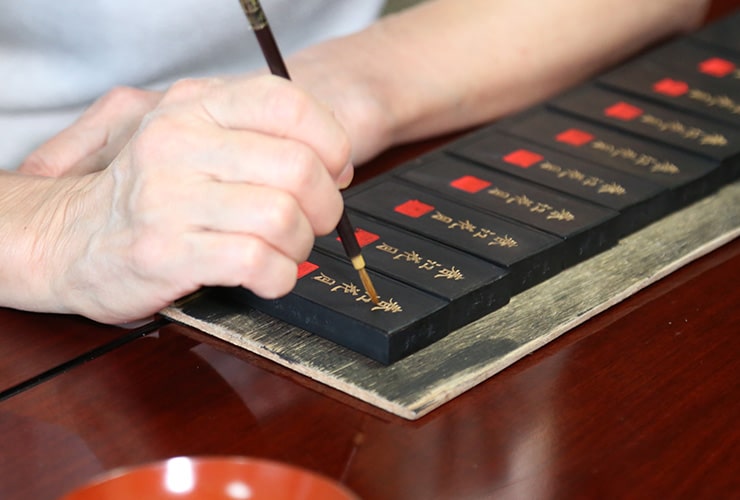
-
8. The Last Step
Immediately after the ink is finished, the gelatin inside is still hard, so it is difficult to rub. Even after it is complete, the ink is still breathing and exhaling moisture. As the moisture of the gelatin dries up, it takes about two or three years for the ink to reach a point where it is easy to write with. Until then, we take care of the ink here at our workshop. One can say that all of this time and effort that goes into making just one small piece of ink is exemplary of our artisan spirit here in Japan.